How to analyze and safely reduce the size of the 'WinSxS' folder, one of the largest folders
in the MS Windows operating system:

The MS Windows operating system contains the 'WinSxS' (Windows Side-by-Side) folder, which serves as a repository for various files related to the operating system. This folder stores multiple versions of each system library, component, driver, as well as old and new updates, different versions of DLLs, and other system files. All these elements are necessary to ensure backward compatibility, the ability to roll back to previous versions, and support for various applications.
Over time, the size of the 'WinSxS' folder can significantly increase, reaching dozens of gigabytes, which is much larger than in a freshly installed system. It is important to note that manually deleting files from the 'WinSxS' folder or deleting the entire 'WinSxS' folder can seriously damage the system, leading to the inability to boot or update the computer.
To safely reduce the size of the 'WinSxS' folder and free up disk space, it is recommended to use the built-in DISM utility. This utility analyzes the 'WinSxS' folder, fixes internal errors, and cleans up unnecessary or outdated components without affecting important system files.
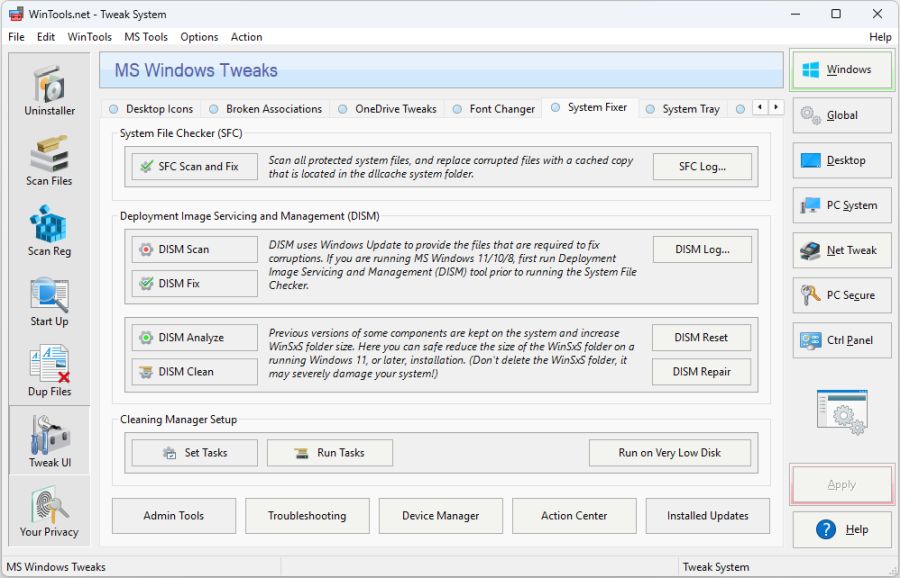
1. To simplify the process of scanning, searching, and fixing errors in the 'WinSxS' folder of the MS Windows operating system, launch the WinTools.net program. In the menu on the left of the main program window, select the "System Tweaker" tool by clicking the "Tweak UI" button. In the "System Tweaker" tool, select the "System Fixer" tab. Here you will find the most necessary and useful functions of the built-in SFC and DISM utilities, so you do not need to remember the commands and keys to run these utilities for scanning and fixing system errors in MS Windows.
2. To start, conduct an analysis of the 'WinSxS' folder. Click the "DISM Analyze" button in the "System Fixer" tab. In the dialog box that appears, confirm the action by clicking "Yes". Then, a console window will open, displaying the analysis process of the 'WinSxS' folder and its results. Note that after the analysis, the DISM utility may request a computer restart. If so, press the "Y" key on the keyboard to confirm the restart.
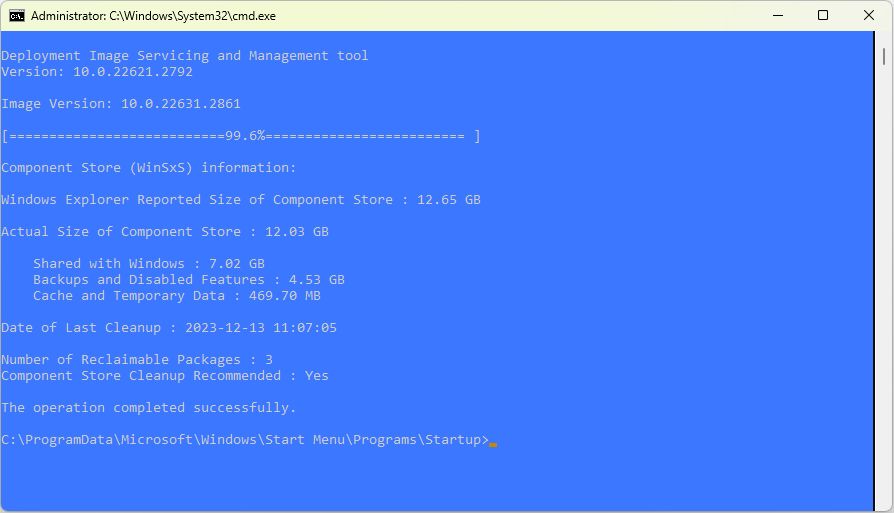
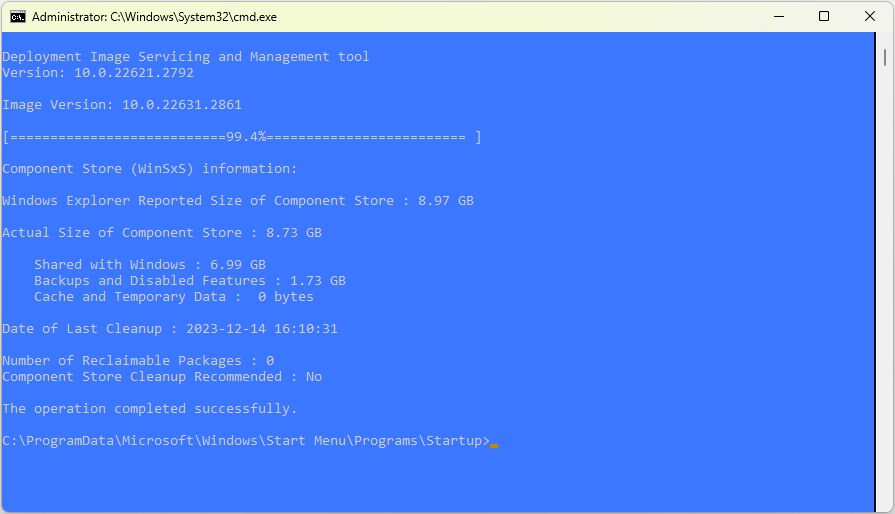
3. As a result of the analysis, we can see the results in the console window, which displays the component store size. In our example, the size of the 'WinSxS' folder components is 12.03 GB. Of these:
- Used by the system: 7.02 GB
- In backups and disabled components: 4.53 GB
- Cache and temporary files: 469.70 MB
- Component store cleanup recommended: Yes
Having received the recommendation to clean up the component store, we proceed with the cleanup process of the 'WinSxS' folder. Click the "DISM Clean" button, confirm the action in the dialog box by clicking "Yes", and start the cleanup process. The console window will display the cleaning process. Be sure to wait until the cleanup is complete and do not close the window until the process finishes.
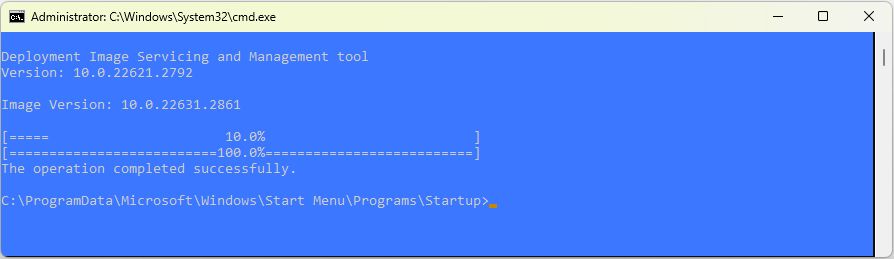
4. After the cleanup process is complete, we can verify the result by reanalyzing the 'WinSxS' folder. To do this, click the "DISM Analyze" button again and wait for the analysis to finish.
5. As seen in the example above, after cleaning the 'WinSxS' folder and reanalyzing it, we obtained the following results. Cache and temporary files were completely removed. The size of components used by the system, as well as backups and disabled components, was significantly reduced. As a result of the cleanup, we freed up 3.3 GB of disk space. No further cleanup is required.
The "System Fixer" tool also offers additional functions for maintaining the 'WinSxS' folder components. The "DISM Reset" button allows you to reset and reconnect the 'WinSxS' components, while the "DISM Repair" button is designed to remove damaged components. These functions can be useful for additional system maintenance.